Help
This page is our FAQ’s page: it contains information we have discovered about how use the blog, etc., and will contain answers to commonly asked questions!
HOW TO REGISTER FOR MEMBERSHIP:
Who can publish Posts on this blog? Members with Author Privileges. Authors are members you have been invited to become Authors by the Admin. Subscribers may publish comments. All comments are moderated twice at first to allow the admin to prevent spam postings.
- How to publish my Author post?
Login with your Username and Password.
On the Dashboard select Posts from the links on the left hand side. Click Add New, or use the “+New” drop down menu from the black WordPress toolbar at the top of the Dashboard page and select Post.
The next page is Add New Post.
Add your article Title.
There are several links to help you format and add text as well as media. There are two views available: Visual and Html. Note: if you cannot paste text into the Post window, select Html, paste and return to the Visual view.
To add a picture, click the Upload/Insert camera icon.
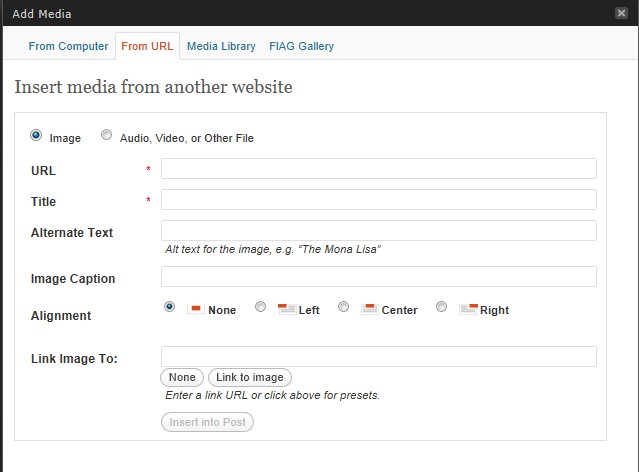
You have several choices: From Computer. From URL. Media Library, or FIGA Gallery.
Browse and Upload images using one of two browser uploaders.
Select images from your computer, from an URL hosted somewhere else, from our Media Gallery (blog files) or chose an image from one of the FIGA Galleries.
From your computer, select a photo and click Open. A new window opens for the image’s properties. Fill in required fields.
Under Link URL you will see the image’s address. There is a File URL button and an Attachment Post URL. You can switch back and forth between the two using these buttons. The Attachment Post URL is the address to use if you want to list images in your post but not show all of them.
Use the Insert into Post button to add your image to the article body.
To re-size the image in the article body window, select it, and drag the corners.
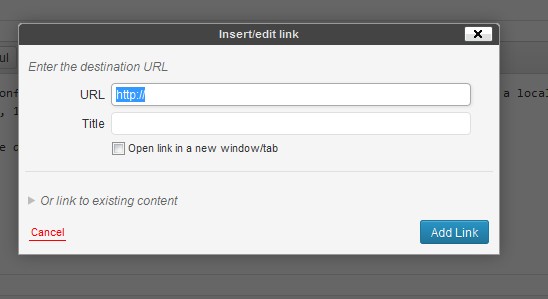
Add text, and add links using the Link button above the text area. You can create links by highlighting text and using the Link button in the Visual tab or by using html code in the Html tab.
From URL, add in the address of the image (even one from our Media Gallery or FIGA Gallery), from Media Gallery, click Show, from FIGA Gallery select Show, to add the image to the article body window.
Due to current issues with posting not yet resolved, DO NOT SELECT MAIN PAGE in the category section to publish to the front of the blog. If you do not select any Category, the post will default to the front page. If you want the article in a category update it to include the categories you want it to appear in. This advice is in a state of flux until this issue is resolved further.
The Preview button is disabled. This is a bug in the theme we have activated.
Click the Publish Button to post your article. To the left of Edit Post on the next page, click View post.
Click the blog’s Name above the post on this preview page to go to the Front Page of the blog to see the post on the Main Page.
If satisfied with the publication, you are done.
If not, click Posts or All Posts in the sidebar to get to the list of posts. Hover your mouse over your article title to reveal links for editing.
Add text or make other changes to the post.
Now the Preview Button is active.
If satisfied, click Update.
Your published article is re-published with your changes.
For a zip file with screenshots in Word, Microsoft Works and PDF click here –
- Can I shorten my links in posts?
Yes! Highlight your text, then click the link button and in the next window put in your url!
In comments, you can use the code button to insert the link and text:
<code><a href=”url“>Link text</a> </code>
- Why do posts published only in the blog’s Categories show up on the Main Page?
This is something we tried to prevent! However, doing so means the post will not show up in Recent Posts. So anything posted in any of our Main Categories, will, by default, also be published to the Front Page. It will also publish to the Category you selected for it, and be available for casual browser’s to discover. If you have a subject that belongs in a Category by all means publish it there so that readers can find it when browsing the blog! Selecting Main Page will publish to the Front Page of the blog. UPDATE! We have installed a plugin that excludes posts in all categories from appearing on the Main Page. You still need to tick Main Page when you post a new article on the blog!
- Can we add images to Comments?
Yes! We have added a simple plugin to allow images to be inserted into comments! The image may be hosted somewhere else or may be from our Library or Galleries. Just get its address (URL) and paste into the popup that you will now see if you click Add an image to comment: click here near the Comment Box.
If the published image is too large, in the Edit Comment window copy the URL of the image, delete the entire code you see in the editing window and replace it with this string of code:
<center><code><img src=”URL” Width= 200 Height=300 alt=”Text”/> </code></center>
Add your image URL and then change the Heigth = and Width= to smaller or larger numbers. Alt= may be a description of the picutre title or any text you wish to use such as a question for the reader! Alt text is intented to describe the image.
Preveiw comment, and click Update! You are done!
- How do we make Galleries?
Here is a video tutorial: vimeo.com… (Thanks to Inga!)
To associate your new Gallery to a link on the blog you must create a new category, and make that new category the child of a parent category. Ask Admin for assistance. Your Gallery named New Gallery might become the child of the category Photos. It will then appear on the blog underneath the Photo category link on the Main Page once you republish the Gallery to both Photos and the name you gave your new child category “New Gallery”. Your posting will appear on the Main Page listed as published in Photos, New Gallery –
- Can we attach Photos?
Yes, there is a way to attach photos. In the Add New Post window click Upload/Insert. You will be presented with a box with tabs above it. Choices are From Computer. From URL. Media Library. FIGA Gallery.
From Computer: you must upload the image. Afterwards, you see a box with options.
Under Link URL you will see a button called Attachment Post URL. Click this button and the url of the photo becomes the URL of its attachment address. Copy/Past this address into your post.
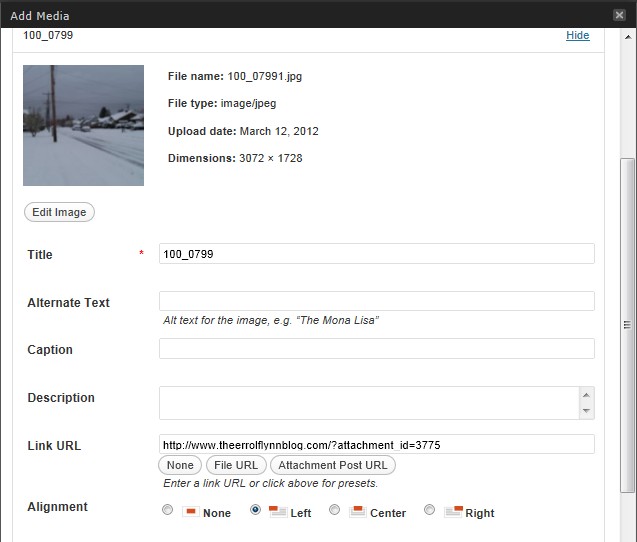
Image is selected by default. Url and Title are required. Your image can be hosted on another site using this option. You can also make the image into a link.
By the way, for everybody, did you know that you can make text links in your comments?
You can post a comment and then use the edit button to get into the Edit Comment page. On this page in the toolbar is a “link” button. This opens a popup that allows you to enter the long link you want to post, then use the Title bar to create a text link. Just click Add Link when you are done!
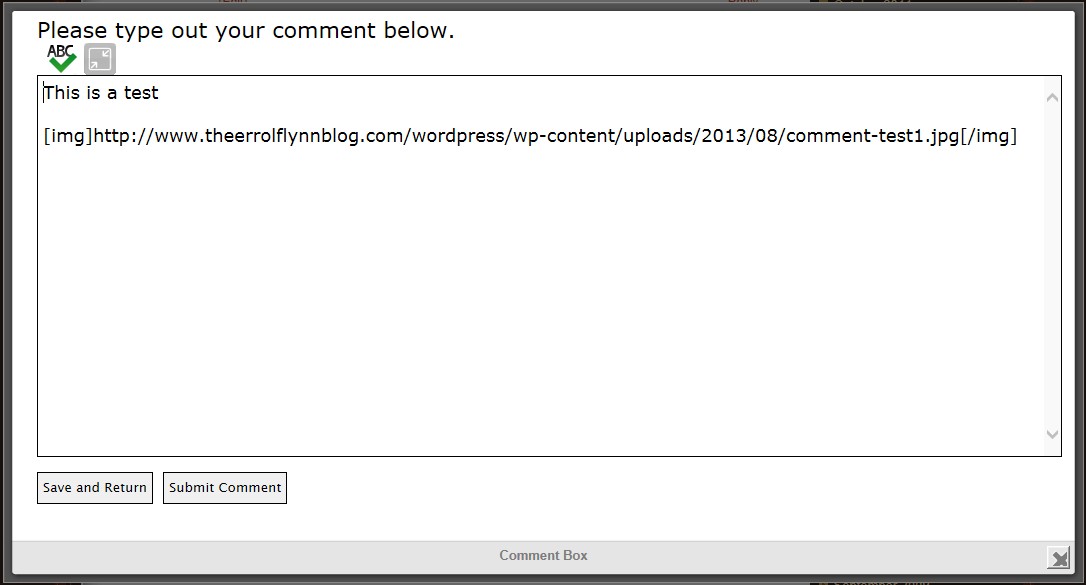
New Comment Box Editor:
We have installed a new add-0n to the Comment Box that gives you new capabilities. It is recommended that you expand the comment box to take full advantage of them, AFTER YOU HAVE BEGUN YOUR COMMENTS.
If not, the “Save and Return” button will not function!
Use the Expand link to open the Comment Box after beginning your comments.
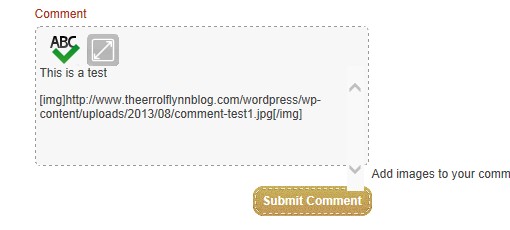
Finish Typing your Comments. If you want to add an image. You can do this before you expand the Comment Box or after you have used Save and Return for the first time. Adding an image will add the code needed to show the image into the Comment Box. Click Submit Comment.
You will then see new Click to Edit or Delete links.
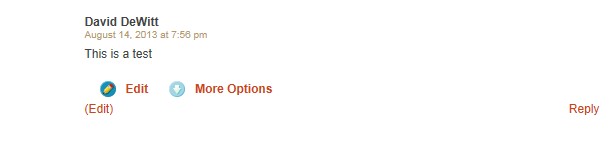
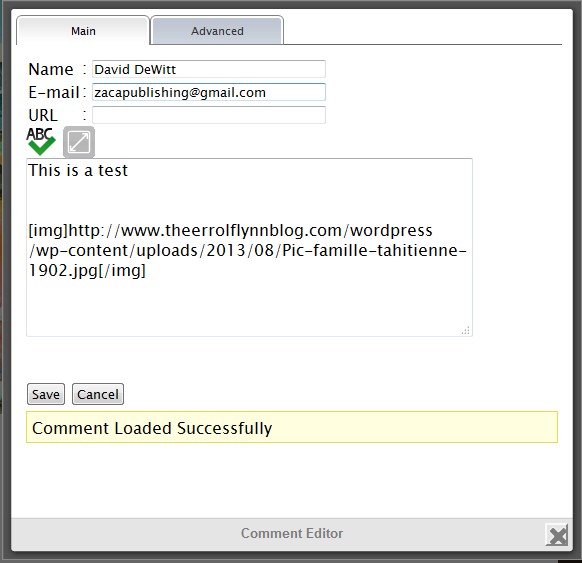
If you select Click to Edit a new window opens and you may edit your comments. Click Save. Your Comment is then re-posted. If you select Delete you will see this:
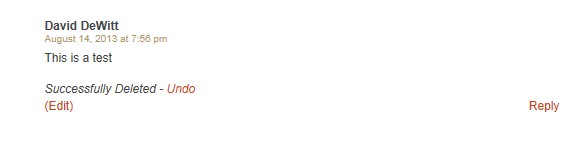
NOTE! You will see the Comment is still there! Just refresh the page and the comment will be gone!
_________________
